Today, I’ll put a few more up – but this time, they were posed shots. Something different, something I want to work on. I’ve never been comfortable posing people for photographs. The only way to get used to it – to get better at it – is to do it over and over again.
Rhythm and Beards playing at the Cobra Brewing Company in Lewisville, Texas.
I often say (boast?) that with a bicycle and a transit pass I can get anywhere in the Metroplex. I think I have proven that (at least to myself) it is possible… but I never said it was always easy.
We were to meet at the Dowtown Carrollton DART station at 10:15, in order to get to the brewery by noon. Since I can always count on the Gods of Transit to be against me (every time I arrive at a train station, the train is pulling out, every traffic light I hit on my bike takes forever to change) I had to leave home two hours before that.
I packed up my Xootr Swift – carrying some extra weight (bottles of iced water) to verify that my homemade panniers are up to snuff – and rode down to the Arapaho train station. I bought the slightly more expensive regional day pass – until now I didn’t realize that it covered the A Train to Denton as well as the TRE to Fort Worth. I caught the Red Line downtown and then waited for the Green Line which took me out to Carrollton.
We met there and road a short trip to the Trinity Mills Station where we caught the A Train. One of these days I need to do this ride and take the train all the way to Denton (a fun city to visit and ride around in) but today we only rode it one stop to the Hebron Station then went the rest of the way on our bikes.
It seem silly to buy a train ticket for only one stop – but this is all new construction, fast stroads, and empty space filled with wetlands and there is no way to ride through there. Someday there will be bike trails, lanes, or more friendly roads, but now it is in the hands of the car-exlusive mindset of developers and suburban governments and they can’t see beyond the dark-tinted windshields of their Tahoes.
We climbed off the train at the Hebron station (the Old Town station is closer, but we wanted to get a couple of extra miles in) and rode up to the Brewery. Our timing was good, it was opening right when we arrived.
The event was a blast – one of the best Brewery Events I’ve been to. Good beer – loved their Best Mistake Stout (but I am a stout fan, after all) and their Junior’s Snake Bite JPA (a smoked jalapeño IPA) was really good. The jalapeño aroma was amazing and the heat was balanced just right.
Beer selection at the Cobra Brewing event.
Cobra Brewing Company, Lewisville, Texas
There was a lot going on – music, classic Triumph sports cars, plenty of facial hair for the beard-growing contest, two guys doing vintage tintype photography, and vendors of everything from food to growlers to mustache wax.
It was also the one year anniversary for Juniors Lone Star Barbecue Sauce – there was a lot of praise for their products. They arrange their array of sauces by heat – most folks settled in at the jalapeño level, but I, of course, want to try the hotter habanero variety.
One nice thing about these brewery events is the wide variety of folks that show up. Young and old, rich and poor, bearded and hairless – everybody is there and everybody is friendly. This one was especially diverse and I’ll be back sometime… even if it takes me three trains and about a dozen miles of bike riding to get there.
The festivities went on until six, but I left a bit early – around four. That was eight hours after I had left my house and I was getting a bit tired and dehydrated. I rode to the nearest train station and drank the water I had packed – which made me feel a lot better. I thought about riding back, but my train pulled in and I decided to call it a day. Always better to leave too early than too late.
Bicycle lights can be pretty expensive, at least for the good ones. But battery powered lights aren’t what I remember from my childhood – where you had a big D-Cell light that would work for an hour or so and then go yellow and dim. The LED has revolutionized flashlights and, by extension, bike lights.
I have a couple handlebar-mounted lights – decent ones, if not top of the line. I usually set them to blink – they are lights that are designed for me to be seen, not for me to see with. On an urban road at night, that’s the most important thing. The streetlights are bright enough for a cyclist to see where he is going – but you want the cars to know you are there. Bright blinking is the best for that… plus batteries last forever.
But riding on trails at night is a different story. I needed something so that I can see – a steady white light facing forward. For example, one night coming home from Critical Mass along the White Rock Creek Trail (actually, it was the Cottonwood Trail, the wooded section just south of the Forest Lane DART station – my destination) at a little after midnight I came upon a group of homeless people sleeping on the trail. Luckily, I saw them with my light. Hitting someone sleeping on the bike trail would not be good for anyone.
Again – the dedicated bike lights cost a pretty penny – but small LED flashlights are powerful and very cheap. They sell them by the containerloads – they take three AAAs – most are adjustable. Very useful lights.
The problem is how to mount them on a bike. I actually want to mount them as low as possible. It would seem that a helmet mount would be the best – but if they are at close to eye level they don’t cast visible shadows. It’s the shadows that help you see objects in the path ahead. A low mounted flashlight will throw long shadows – easy to see.
I tried a number of solutions – velcro straps worked pretty well – but nothing was both strong, reliable, and still removable.
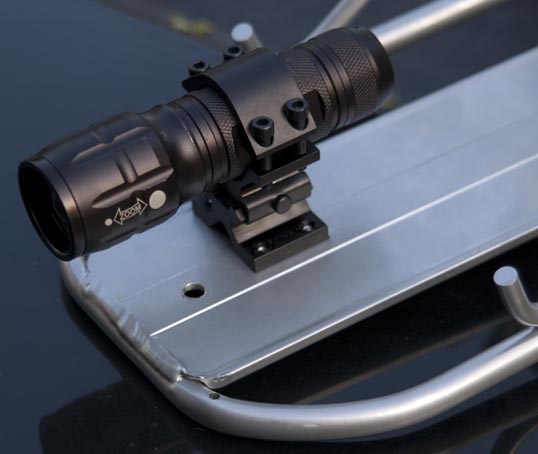
Until I discovered the world of Picatinny (and Weaver) rails. These is a whole host of accessories designed to mount on pistols, rifles, shotguns, or paintball guns. Laser sights, scopes, cameras… and, especially tactical flashlights. This seemed like a perfect thing to mount on a bike.
It didn’t take much searching until I found this Weaver/Picatinny rail mount with flashlight holder on Amazon – shipped from China for less than five dollars. I ordered a couple of them (for spares and different bikes) and after a patient wait, the package arrived from halfway around the world.
Now that I am outfitting my new Xootr Swift for city riding and commuting I decided to add a small front rack. I’ve found these to be indispensable for urban riding. For bike riding in the city, it’s not always about cargo capacity, it’s about organization and a front rack helps me keep organized.
I bought the cheap rack, and then mounted the rail on the bottom of the rack. Here’s how.
The Picatinny/Weaver rail flashlight mount as it arrived.
Four mounting holes go into the small front rack. Do this with some care – or the flashlight won’t shine straight ahead.
I could have mounted the rail with the bolts that come with the assembly, but I decided to use aluminum pop rivets for weight, strength, and neatness.
The rail mounted on the rack and the flashlight in the holder. My flashlight was a little too big, so I simply used the longer bolts that come with the unit – the ones that are intended to go around a barrel.
This is how it mounts on the rack. Strong and neat.
The rack and flashlight on the bike, along with a small pump (maybe I’ll post how I hold that to the rack) and a little plastic box from Office Depot, held on with nylon bolts and wingnuts in holes drilled through the box and rack. It looks sort of stupid, but is very useful to hold my wallet, phone, keys, lock… that sort of stuff.
Take some care in mounting the rack so that it is level. If the rack points up or down very much, you would have to shim the holder to get the light horizontal.
The flashlight is held on securely, yet it comes off easily for battery replacement. I ordered an extra set so I even have a spare flashlight to stick in if needed.
So I did some work on getting my lights on the bike – which didn’t take too long. I sat down for a minute, put on a jacket, and then headed out into the night.
I had only intended to try the thing out, maybe once around the block. But you know how new things are. I’m not really into possessions – far from it – but a new bicycle… that’s different. Before I knew it I was at the end of the trail, four miles from home and I needed to get back. I had to be at work two hours early and here I was, in the middle of the night, on a bicycle too far from home. It was going to be a tough day tomorrow.
So far, I love the bike. It took a little getting used to – the small wheels are very responsive. But it is comfortable and fast. Like the reviews said, it is rock-solid.
So far I am very happy. And happy is a good thing to be.
Tomorrow, I’ll work on mounting the Crossrack and then start on thinking about the front derailleur kit. There is always more work to be done.
The basic fold on the Xootr Swift. It basically folds in half – and it only takes a few sconds. Not a tiny package – but small enough to make the bike more practical to transport or store.
I drive a tiny car – a Toyota Matrix. I always liked it because I could fold the rear seats down and get a bike (barely) into the back of the car (never liked exterior bike racks). I ways surprised at how small the Xootr Swift folded down. I was able to fit it easily in the small space behind the rear seat. The handlebar and stem come off with a quick release for a little extra space. Now I have a four-passenger car again.
It was nineteen eighty six (or so) when I bought my Raleigh Technium. That was the last new bicycle I’ve bought (I bought a used mountain bike in 1992 or so and another used one last year when that broke and I needed a commuter bike). For a long time I’ve been wanting to buy a new bicycle, but having two kids in private college has made me too broke for too long of a time.
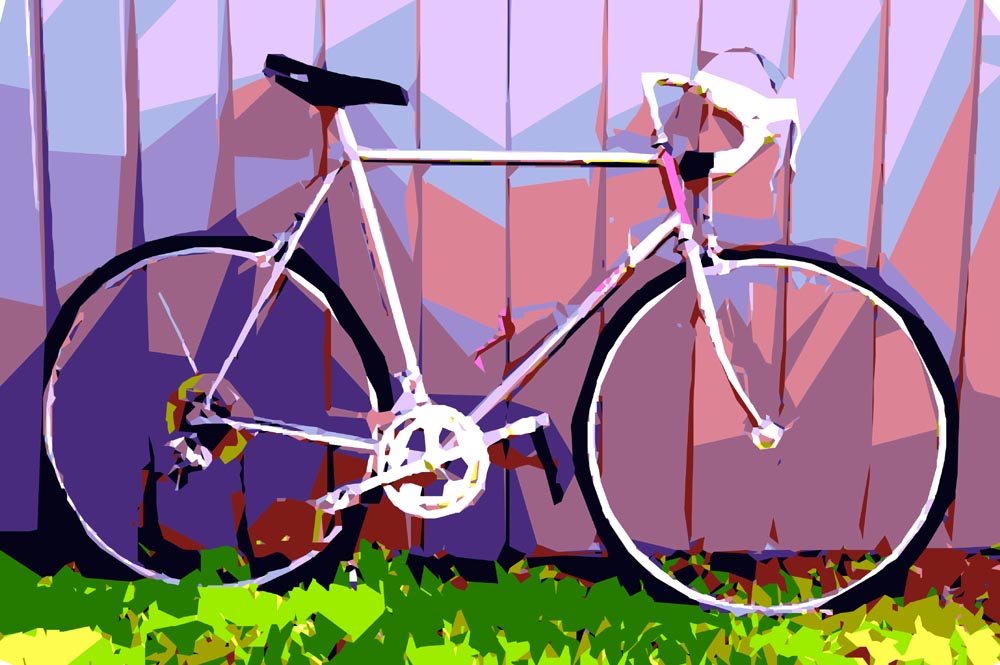
My Giant Rincon SE commuter bike bought used off of Craigslist.
Now, I have only one still in school (Lee has graduated and is a financial analyst in New Orleans, if you can believe it) and the second is almost done so I tamped down my inner cheapness and bought the thing.
I have been thinking about what bike to get for years. At first, I wanted a modern, carbon, lightweight road bike. But that’s not the kind of riding I have been doing. I’m not in anywhere near good enough shape to do justice to a bike like that.
What I like to do is ride slowly, around the city. So, the second type of bike I thought about is an urban cruiser – maybe a throwback old-school steel bike, or a touring bike. That would have been a smart purchase and that’s what most of the folks I ride with use.
But what I’m really interested in is trying to fully integrate my bicycle riding with the rest of my life. Here in the vast sprawling DFW Metroplex that means using other transportation – the train or even a car – in conjunction with a bicycle.
Thinking about that aspect of riding – I kept coming back to the idea of a folding bicycle. Something that I could keep in the smallest of trunks, or on a train…. The versatility of a good folder would open up a lot of opportunities. Plus, I have my commuter bike already… and my Technium is an old-school road bike – there is no reason to give up on them. A folder would simply add to the possiblities.
That was actually a good thing. A cheap folder would have been a mistake.
There are a number of folding bicycles out there. There is the Brompton – a beautiful complex design that has an intricate folding method that collapses into an incredibly tiny cube of metal. Then there is the Bike Friday – very well made but very expensive. And the huge line of Dahon bikes – there is one for every wallet and need.
As I did my web research, I came across an odd bike, called the Xootr Swift. It was made by a company better known for their kick scooters. As I looked at it, though, it seemed to make more and more sense.
It is known as the best riding of the folding bikes – it rides like a full-sized bike.
It uses standard bike parts and can be infinitely customized.
The Xootr Swift has a weight limit much higher than the others (unless you buy a special “heavy option” Bike Friday – which is very expensive) – the vertical fold of the Swift is stronger than the hinged designs of the others.
The big disadvantage of the Xootr Swift is that it doesn’t fold very small. For me, that wasn’t a concern. I wanted something that will fit in a trunk or take up a little less space on the train – I don’t plan of flying with it.
There was one final item that convinced me to get the Xootr Swift – and I’m a little ashamed of this. I looked all over town, at all the rides, for another Swift, and never saw one. Nobody I talked to, even folks that had other folding bikes, had even heard of a Xootr Swift. As far as I could tell, nobody in Dallas owns a Xootr Swift. I know that can’t be literally true – but for all practical purposes it is. It would be cool to own a unique bike.
The last negative thought was that I would look stupid and ridiculous on a folding bike – sort of like a bear riding a clown bike. But what the hell – losing your last bit of pride and self-respect is a very liberating thing…. So fuck it.
My final decision was what accessories to get. I struggle up steep (and not so steep) hills. I want this bike to be as useful and as versatile as possible, so I ordered a front derailleur (the stock setup is 1×8), shifter, and a smaller second front gear to use on those steep inclines (and to get home when I’m really tired).
Then I had to decide on getting a rack. If left to my own devices I’d fill a bike up with all sorts of crap, and I already have my commuter bike for that (front and rear racks, fenders, a plastic ammo box bolted to the front – that sort of shit) so I thought about keeping the Swift clean.
But, again, I want this bike to be versatile – and that means I will want to carry cargo sometimes. Xootr sells a special rack for their folder called a Crossrack. Looking at the design, I realized the homemade panniers I just made would fit like a glove – so I broke down and ordered a Crossrack.
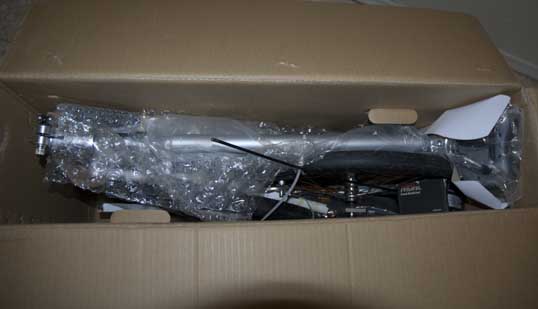
Five days ago I logged onto the Xootr website and placed my order. Standard shipping was free. Today, about an hour after I came home from work the doorbell rang and when I opened the door, there was a brown truck speeding away and a cardboard box on the front porch.
The box was surprisingly small and light. I guess that’s what you get with a folding bike.
The box. Pretty small for a bicycle.
A lot of packing material.
So now I have to start putting the thing together. I should have enough time to get a quick test ride in before it’s too dark. That will have to wait for another entry – so for today, if you are interested in the bike, you’ll have to be satisfied with some of the links I found while researching the bike.
Folding Bike Buyer’s Guide – UK specific, does not include the Xootr Swift – but still an interesting read for general information on folders. I enjoy the negative reviews.
What is a commuter bicycle without panniers? For example, one 2014 New Year’s Resolution for me is to not drive my car to the grocery store. I have a big pair of cheap panniers that works well for that, but they are hooked together and only work as a pair. I wanted two separate panniers that can be mounted together, were versatile, easy to put on and off, and a certain size – not too big, not too small.
Of course, the smart thing would be to buy a pair – there are plenty of good, professionally-designed and well-constructed bicycle panniers around. But since when do I do the smart thing?
I am too cheap.
So I decided to make my own. I’ve been getting by with buying various containers at Goodwill and hooking them on to my bicycle with carabiner or S clips. That actually works well. The most useful is a rectangular zippered bag that held an old portable Colorado brand tape-backup unit. Still, I wanted a more conventional pannier set.
So I perused the internet, looking for “DIY Bicycle Panniers” on the search engines. I found quite a bit, from used kitty-litter boxes, to 5 gallon paint pails, to the ubiquitous hipster milk crates. I copied down the best ideas and worked on my own.
A Musette Bag like the one I used for the panniers.
For a bag, I settled on the Rothco Jumbo Musette Bag – the price was low, the local Army-Navy store had a selection at well under list price, and, most important, it had a stout map pocket – two layers of canvas on the back. So, I bought two, went to the hardware store for fittings, and set to work.
The pegboard is a tight fit slid into the back of the musette bag.
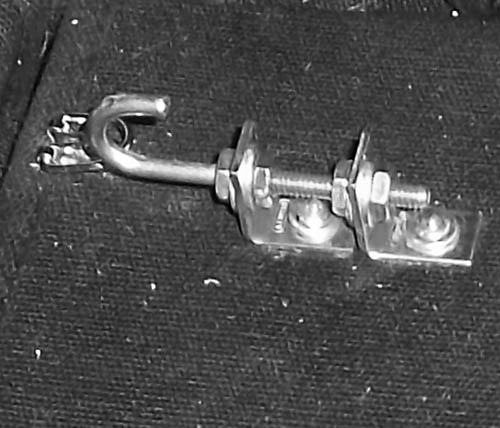
Once I had the bags, I cut a rectangle of pegboard (a little heavy, but I had some on hand) to size and slid it into the map pocket on the back. This would give the pannier shape and give me something to attach the hardware to. Then I had to decide on a hook system to hold the bag to the rack. After looking at all sorts of stuff, I decided on these little steel threaded hooks. I would mount two small angle brackets to the backing board, and thread the hooks through them.
The hooks as they came from the hardware store.
A hook mounted onto the back of the bag. Two small angle brackets, four nuts, four washers, and two pop rivets (with washers) – and it is all in place. Be sure and use locktite (blue) to keep the nuts from going loose.
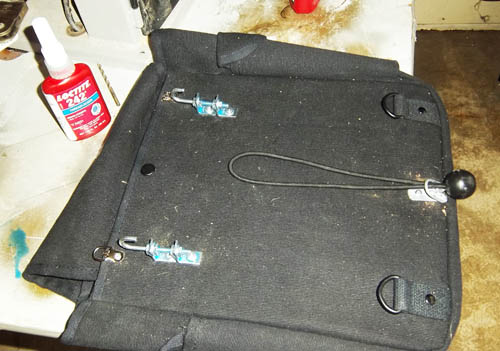
I could have bolted everything to the pannier, but I used pop-rivets and aluminum washers. This worked really well, and once I had a pile of parts laid out, a drill spun up, and the pop rivet gun in hand, it was quick work to attach all the hardware. I added a metal hanger at the bottom to hold the thing down and two more at the top in case I want to bungee something on there. These extra rivets also serve to make sure the bag doesn’t tear off the backer board. It’s all surprisingly strong.
The two hooks, the ring at the bottom, and the bungee cord. Ready to go.
Finally, I had to figure out how to hold it down, keep it from swinging, or popping off the rack. I experimented with springs and ordinary bungee cords, but ended up using these small elastic cords with a plastic ball on the end. They are usually used to hold down tarps.
The elastic goes through the bottom hook of the rack, through the lower eye on the pannier, and then loops up around the upper hooks. This gives just enough tension to hold it all together, yet allows it to come off easy.
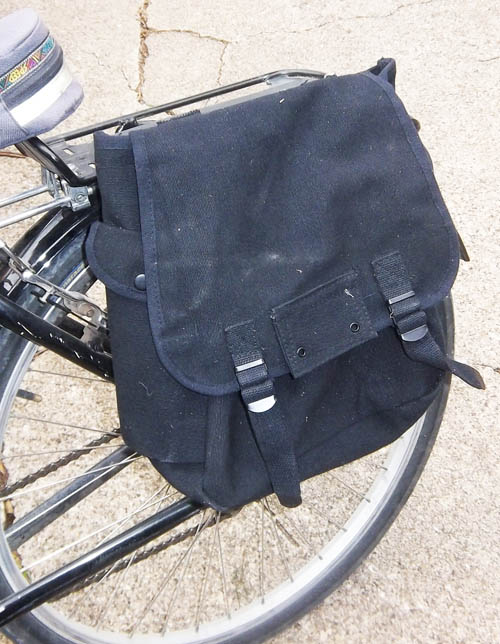
So here it is, a pair of workable panniers, for shopping, picnics, or general bombing around town. Total cost, about twenty dollars each. I think these may work.
The musette bag on my commuter bike.
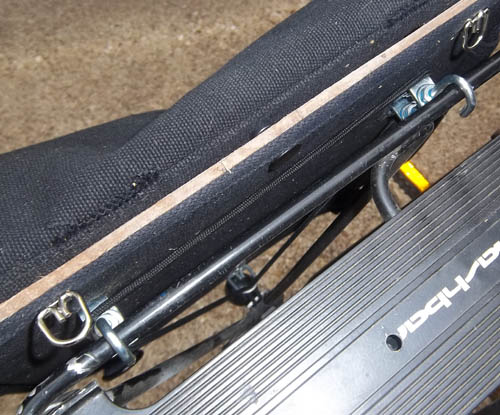
The hooks on the rails of my bicycle rack. If you look close, you can see the thin, black, bungee cord running across the hooks and then down to the bottom of the rack.
As I rode down from the train station all the walkers coming the other way said, “They’re a long ways ahead of you.” All of them, really.
“I’ll catch up, don’t worry,” I replied.
And I did. It was a lot of fun.
Skipping rope at Ye Olden Tymes Vintagey Retro Ride & Picnic. (click to enlarge)
As I was working my way through South Dallas on my bicycle exploring three of the Nasher XChange sites – between Flock in Space and Black & Blue: A Cultural Oasis in the Hills – I took a look at the GPS on my phone to make sure I wasn’t lost. I realized that I wasn’t far from something I wanted to visit. Even though I was behind schedule and getting tired I would be passing close enough to make a side trip.
It looked pretty interesting, enough for me to visit.
Snøhetta Pavillion, College Park, Dallas, Texas (click to enlarge)
Picnic Tables and Grills, Snøhetta Pavillion, Dallas, Texas (click to enlarge)
I couldn’t stay long, but it was pretty cool in person. An ingenious design – unusual, yet in harmony with the site. Striking, yet useful. It seems to have been economical to build and designed to last a long time.
The picnic tables and outdoor grills were an unexpected treat – I loved the design of these. I didn’t think there was much you could do with public picnic tables – but these were unique and cool.
Later, at home, I did some web research and found a publication that extolls the virtues of the Pavilions in Dallas parks – listing a whole slew of them.
Now that I’ve finished with the Nasher XChange, maybe that’s something I can cycle through town and look at. Picnic Pavilions are pretty pedestrian objects and I have to say I haven’t noticed them for a long time.
But isn’t that the point? To try and ride around my own city and notice things that everyone usually ignores?