A long time ago, when I was a young, avid bicyclist I had a salesman call on me. He shared my love of the human-powered two-wheel machines. We’d grab a bite and talk bikes. I remember him telling me, “My wife is really upset at the number of bikes I have. I’ve got my road racing bike, my triathalon racing bike, my around-the-neighborhood-beater bike, my mountain bike, my touring bike, my cargo bike that I take to the grocery store, a tandem, and a fun pavement bike. Eight bicycles are too many for one person, but I can’t think of any of them that I can live without. I want an ultralight road bike, but she says I have to get rid of two before I can buy one more. I don’t know what I’m going to do.”
I said that I knew exactly how he felt.
Right now, I can’t live with fewer than two bikes. I have my old road bike, my vintage Technium – I call it my “fun” bike. For a machine that’s almost thirty years old it’s light and nimble enough, fairly narrow tires, and I keep it as “clean” as I can and still carry what I need. It’s good when I want to crank out the miles.
But I wanted another bike, a “commuter” bike. That bike is the opposite – a bike with all sorts of shit hanging on and off it. Wide gearing, wide tires, fenders, front and rear racks, two water bottles, room for locks and tools, lights, and upright handlebars. In other words, a bike that can go anywhere and carry anything.
European style bikes like that are now available with great accessories such as internal-geared hubs and generators for lights. I can’t afford that, however, so I began to rebuild something in my garage – my old 90’s-era Yokota Yosemite mountain bike (I bought it [used, probably hot] in a pawn shop around 1994 for sixty dollars). I scoured the Internet for bargains and sales, and picked cheap, used stuff up at swap meets and came up with the parts I needed.
The last time I wrote about it – I had stripped the paint off the old, mostly white bike (the paint was hopelessly scratched and torn up). So now I’ve rattle-canned the thing a dark green (Charleston Green – almost black) and put it back together. The paint job is embarrassingly bad – but it won’t rust.
Some of the gear I have on it:
- Nashbar Rear Rack
- Front Rack – picked up used at a swap meet
- New V-Brakes bought on clearance online (to replace the weak squeaky cantilevers)
- New shifter-brake combo levers
- Bar ends
- The narrowest almost-slick tires the wheels will take.
- Old seat-bag with tools (these never come off the bike)
- Head and tail lights and an extra mount for an emergency flashlight
- Mini-pump and velcro mount (I broke the plastic water-bottle mount)
- New grips
- Platform pedals (inefficient, but I want to be able to get on and off quickly – no clicking in)
- Italian Saddle (bought used off Ebay – a lot of folks think those big, wide seats are comfortable, but once you are used to them the narrow saddles are best. Unfortunately, I left the thing on the porch one evening and the dogs chewed the leather a bit – but it still works).
- All fresh ball bearings in the wheels and bottom bracket
- New middle sprocket (the old one was amazingly worn) and chain
- Planet Bike ATB plastic fenders
That looks like a lot – but I only spent a couple hundred dollars or so. A lot cheaper than a new bike.
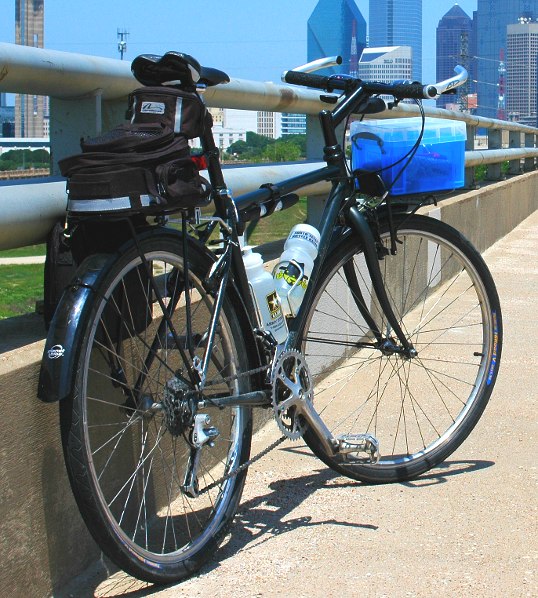
I’ve been experimenting with mounting crap on the front and rear racks. I bought a used bag at a swap meet that works on either one – it holds my camera well. For a while, I’ve had some panniers and a cooler that I can carry cold water in – that helps get me through the summer. I have this nice little plastic box I bought at Staples and mount on the front with nylon wingnuts – it looks awful (it’s this bright translucent blue – I’ll go by there and get a grey one soon) but is handy to throw in last minute stuff – phone, lock, whatever.
Finally, I’ve been experimenting with ways to mount writing materials (pens, moleskine, and/or my Alphasmart keyboard) to carry for bicycle writing marathons. I’ve found a couple of compact bags that hang from the rear rack with two small carabiner clips. Works great (If I carry a full laptop I prefer to wear a backpack – for a little more cushioning and safety).
This gives it a junked-up appearance. I don’t care. This is my go-anywhere and do-anything bike. It’s not for looks.
My commuter bike
Obviously.
So now I have my commuter bike. It’s a lot more work than the road bike (the wide tires, weight, and the upright position) but it gets me where I need to. Anything less than fifteen miles or so aren’t a real problem – and it can go anywhere in any weather (as long as I can hold up – it can).
Before:
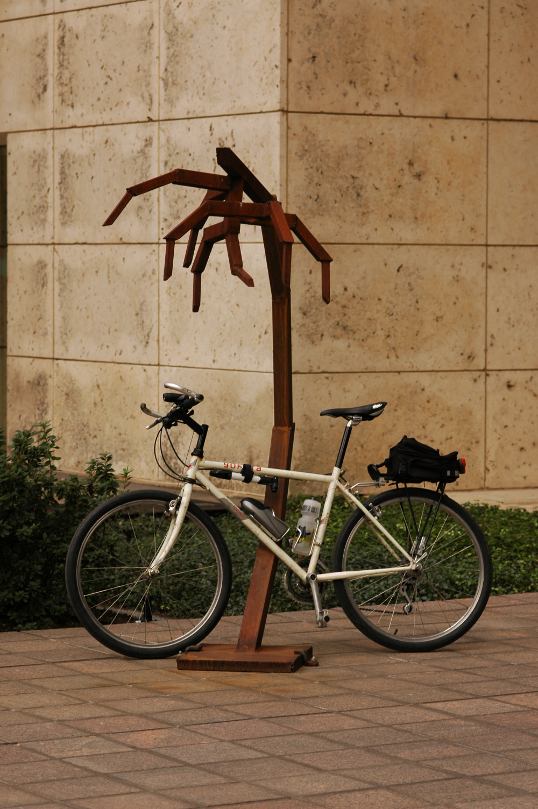
My commuter bicycle – I’m now taking it apart for a rebuild.
During:

A lot of tubes, a lot of paint to scrape off.
And After:
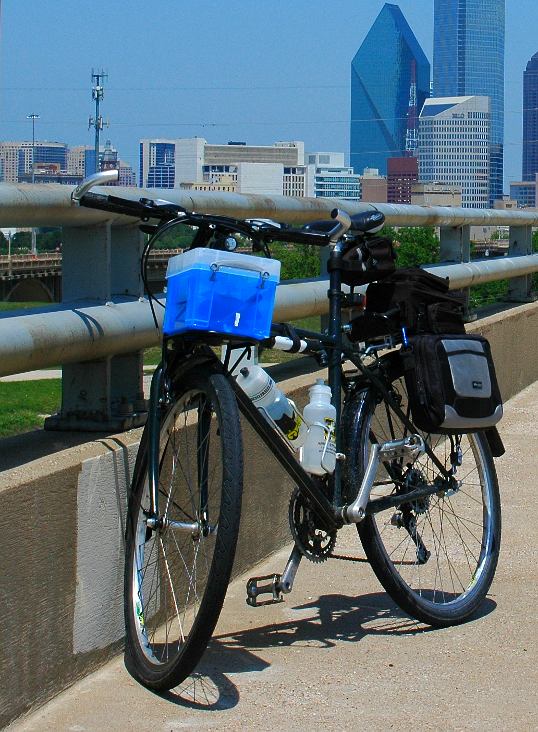
You can see the bag (I think it used to hold a portable DVD player) hanging on the rear rack. Perfect for a Moleskine and some pens.


